Long-time readers of my blog may remember my adventures with my 2009 27″ iMac – adding eSATA, displaying all of Hamlet, and turning it into a monitor. That last bit has become increasingly handy lately, as I’ve repurposed that now-old iMac as a monitor and server. Here are some tips, tricks, and lessons if you’d like to do the same!
This obscure feature gave my older iMac a new life as a monitor and server!
Using an iMac As a Monitor
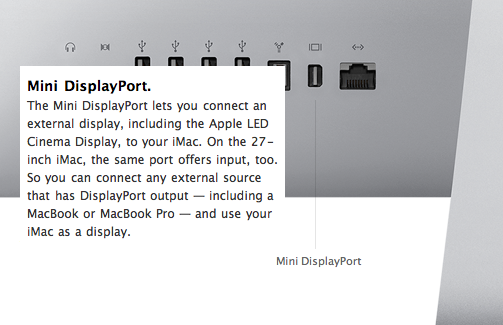
I’ve known since I bought it that the iMac could serve as a monitor for an external DisplayPort device. This works perfectly with Apple’s own products, of course, including my 15″ Retina MacBook Pro. I just hooked a Belkin Mini Display Port cable between the MacBook and iMac and, poof, the iMac screen becomes an external monitor.
A few pointers for using the iMac as a monitor:
- A single DisplayPort cable can carry full-resolution 2560×1440 video to the iMac. It’s detected perfectly by Mac OS X, and there’s even a Display Profile called “iMac”. It’s really just as gorgeous as the internal iMac video card!
- Screen brightness can only be controlled by a keyboard connected to the iMac, not from the external device. And then, it only works when you’re logged in. So make sure to adjust the brightness before your screen saver comes on on the (display-less) iMac!
- The DisplayPort cable carries audio as well as video, so you can use the iMac’s speakers as well as the screen. It shows as “Color LCD” in the Option-Click “Output Device” list.
- You can only adjust audio volume from a keyboard connected to the iMac. Thankfully, this seems to work even if you’re not logged in.
- You won’t have access to the ports on the iMac (microphone, camera, Ethernet, FireWire, or USB). For that, you’ve got to use a Thunderbolt Display!
One issue is getting everything running smoothly. with an external keyboard and trackpad on the MacBook Pro. My workflow for using the iMac as a monitor is as follows:
- Start the MacBook Pro alone, lid open and display on. Log in as usual.
- Connect the peripherals – I’ve got the Thunderbolt Ethernet adapter as well as a USB hub with my keyboard, headset, and Drobo. Connecting these after the iMac display has been flaky. I don’t know why but I don’t want to risk it.
- Power on the iMac and log in with its keyboard. This will let you adjust the brightness so it’s not retina-burning full-on.
- Connect the DisplayPort cable between the iMac’s Mini DisplayPort socket and a Mini DisplayPort socket on the notebook.
- Let the MacBook discover and activate the iMac as an external display with its own internal LCD still active. The internal LCD will still show the desktop and applications, with just wallpaper on the iMac screen.
- Close the lid on the MacBook and let it shift everything over to the iMac screen.
- Adjust the brightness using the iMac keyboard. You have to do this before your iMac screen saver kicks on.
- Optionally, move your audio output to the iMac by option-clicking the “speaker” icon in the menu bar and selecting “Color LCD” as the Output Device. You can adjust the audio volume at any time, but you must use the iMac keyboard rather than the menu bar or MacBook keyboard controls.
When you’re ready to stop using the iMac, it’s best to perform these steps in the opposite order. Note that, if you simply unplug the Mini DisplayPort cable from a closed-lid MacBook, it will immediately go to sleep. This will disrupt anything you’re doing and might be a Very Bad Thing. To keep this from happening, open the lid first, then unplug the video cable.
You’ll often have to use the keyboard and mouse on the iMac even if you’re just using it as a monitor: You’ll need to log in so you can adjust the brightness, and will likely have to adjust the sound volume, too. I am using the Apple Wireless Keyboard and Magic Mouse that came with the iMac for this purpose. I just set them behind my Unicomp Spacesaver M keyboard and Tragic Macpad and reach over when I need them.
Repurposing an iMac As a Server
One issue with using the iMac as a monitor is that the computer part must remain powered on the whole time. Although it idles the CPU and hard drive, all the guts are still sitting there, running and drawing power. What to do with them?
I decided to repurpose the iMac’s computer bits as a home server, since they’ll be running anyway. Our house includes two Apple TV’s and many iPads and iPhones, so an iTunes server was welcome. Plus, I’ve got an older Drobo attached via FireWire for file services and a USB ioSafe drive for backups. A genuine iTunes instance is much more reliable than any alternative media server, and the same goes for a real Mac OS X AFP service.
Happily, it’s pretty easy to set up Mac OS X as a server. Just go into the “Sharing” control panel and start adding services. I have File Sharing (AFP), Remote Login (ssh), and Remote Management (VNC) enabled. I also added iTunes to my startup items so it comes up whenever I log in.
One handy tip for using an iMac as a server is to reduce the screen resolution in the control panel. A lower-res screen is a huge help, since I’ll mostly be using it via VNC (with Screen Sharing from the MacBook Pro or Wyse PocketCloud Remote Desktop Pro on the iPad and iPhone). I dropped it to 1600×900, but could go further. It still looks fine when it’s running the iMac’s panel but is way better for use in VNC! Plus, it’s very “Inception” to show a screen sharing session to the iMac’s guts on its own panel via the MacBook Pro!
Stephen’s Stance
This is all working surprisingly well. I leave the iMac running as a server and plug into its screen with my Retina MacBook Pro when I’m “in the office”. Apart from a few gotchas (notably the screen brightness) I’m quite happy with my “Inception” iMac!
© sfoskett for Stephen Foskett, Pack Rat, 2013. |
Repurposing an Older iMac As a Monitor and Server
This post was categorized as Apple, Terabyte home. Each of my categories has its own feed if you'd like to filter out or focus on posts like this.


